
With the holidays right around the corner, it’s never too
early to start thinking about ways to decorate. These simple ornaments are both classy and easy to
make. Whether you need a thoughtful gift for the office party or you're looking
to create memories with the kids, these ornaments can accomplish any goal.
These simple, but sophisticated ornaments are my take on
ones found on Pinterest. As you read through this tutorial, think about ways
you can add your own twist to the ones you create!
Snowy Scene
Directions:
 1. Condition 1/2 pack of pearl clay.
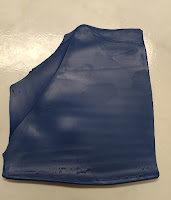
2. Roll out sheet of pearl clay on the #1 (thickest) setting.

What you’ll need:
- Black, blue, and pearl clay—brand of your choice (I used Sculpey III)
- Tissue blade (flexible)
- Circle cutter approx 2-3" in diameter
- Rhinestones—color of your choice (I used clear)
- Glue
- Pearl acrylic paint
- Fine tipped paint brush
- Ribbon (for hanging)
- Small tree-shaped cutter (or you could create the tree by hand)
Directions:
 1. Condition 1/2 pack of pearl clay.
 2. Roll out sheet of pearl clay on the #1 (thickest) setting.

3. Clean clay machine to remove any leftover pearlescence.
 4. Condition and blend 1/2 pack of blue clay with 1/8 pack of black clay to make a darker shade of blue. Note: if you've selected a dark blue that you like, there's no need to add black to make it darker.
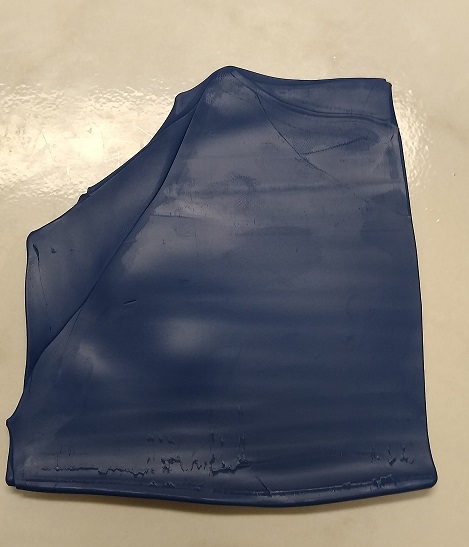 5. Roll out sheet of dark blue clay on the #1 (thickest) setting.
  6. Place the dark blue sheet on your workspace and use the circle cutter to create the base of the ornament.
7. Remove unused clay and smooth any rough edges of the ornament.
8. Move the ornament base to the side and clean up any remaining blue from your work area.
9. Place the pearl clay sheet on your workspace—you'll be using this sheet for the snowy hill and the tree silhouette.

10. Just as you did with the dark blue clay, use your circle cutter on the pearl clay sheet.
 11. Before you discard the remaining scraps, use your tree cutter to cut out the silhouette of a tree.
 12. Remove any excess pearl clay from around the circle and the tree.
 13. Bend your flexible tissue blade into a curved hill shape—hover your blade over the pearl clay to help visualize the shape.
14. Once satisfied with the shape, cut to make the snowy hill.
15. Using your tissue blade, gently scrape the pearl elements up off your workspace.
 16. Arrange the snowy hill and tree silhouette onto the dark blue ornament in any configuration you like.
17. Make sure all pieces are attached by gently pressing or using your roller—try not to leave blemishes, fingerprints, or create distortions.

18. Punch a small hole in the top center of the ornament for hanging (big enough for your ribbon to fit through).
19. Bake your ornament at 275 for 15 minutes.
20. Let cool.
21. Using the fine tipped paint brush and the pearl acrylic paint, create stars of various sizes on the blue part of your ornament—this resembles the night sky.
 22. In the larger stars, use a small amount of glue and place a rhinestone in the middle to add sparkle—do this once the paint has dried.
23. Once the embellishments on your ornament are dried, add he piece of ribbon and hang.
Twisty Tree
What you'll need:
- Black, blue, and pearl clay—brand of your choice (I used Sculpey III)
- Tissue blade (flexible)
- Circle cutter approx 2-3" in diameter
- Rhinestones—color of your choice (I used clear)
- Glue
- Clay extruder with small circle disk
- Ribbon (for hanging)
Directions:
1. Condition 1/2 pack of pearl clay.
2. Roll out sheet of pearl clay on the #1 (thickest) setting.
3. Clean clay machine to remove any leftover pearlescence.
 4. Condition and blend 1/2 pack of blue clay with 1/8 pack of black clay to make a darker shade of blue. Note: if you've selected a dark blue that you like, there's no need to add black to make it darker.
 5. Roll out sheet of dark blue clay on the #1 (thickest) setting.

6. Place the dark blue sheet on your workspace and use the circle cutter to create the base of the ornament.
7. Remove unused clay and smooth any rough edges of the ornament.
8. Move the ornament base to the side and clean up any remaining blue from your work area.
 9. Place the conditioned pearl clay into your extruder and create a thin rope of clay. Note: the diameter of your rope is up to you, but thinner works better.

10. Gently twist the pearl clay rope back and forth on the blue ornament in a tree shape(larger at the base and smaller at the top).
11. Ensure the pearl clay rope is secured to the ornament.
 12. Punch a small hole in the top center of the ornament for hanging (big enough for your ribbon to fit through).
13. Bake at 275 for 15 minutes.
14. Let cool.

15. Once cooled, glue rhinestones to the tree as you like.
16. Add ribbon to the hole at the top for hanging.
 There are so many variations to these ornaments. While I was in a creative mood, I also made an ornament that follows the same design as the ones above, but uses a dark red background and a green tree silhouette.
Did you create something great? Send us a picture of your ornament!
2. Roll out sheet of pearl clay on the #1 (thickest) setting. 3. Clean clay machine to remove any leftover pearlescence.
4. Condition and blend 1/2 pack of blue clay with 1/8 pack of black clay to make a darker shade of blue. Note: if you've selected a dark blue that you like, there's no need to add black to make it darker.5. Roll out sheet of dark blue clay on the #1 (thickest) setting. 6. Place the dark blue sheet on your workspace and use the circle cutter to create the base of the ornament.
7. Remove unused clay and smooth any rough edges of the ornament.
8. Move the ornament base to the side and clean up any remaining blue from your work area.
 9. Place the conditioned pearl clay into your extruder and create a thin rope of clay. Note: the diameter of your rope is up to you, but thinner works better.
10. Gently twist the pearl clay rope back and forth on the blue ornament in a tree shape(larger at the base and smaller at the top).
11. Ensure the pearl clay rope is secured to the ornament.
 12. Punch a small hole in the top center of the ornament for hanging (big enough for your ribbon to fit through).
13. Bake at 275 for 15 minutes.
14. Let cool.

15. Once cooled, glue rhinestones to the tree as you like.
16. Add ribbon to the hole at the top for hanging.
 There are so many variations to these ornaments. While I was in a creative mood, I also made an ornament that follows the same design as the ones above, but uses a dark red background and a green tree silhouette.
 Did you create something great? Send us a picture of your ornament!
No comments:
Post a Comment