
This month, we'll show you how to make this beautiful swirly clay slab that's perfect for jewelry or any project you can imagine!
This easy-to-make swirly slab can be created using any colors you choose. We used Premo Ultramarine, Premo Souffle Jade, and Premo Translucent.
What you'll need:
- Clay machine
- Tissue blade (the rigid one)
- Metal flake (color of your choice)
- 1/2 pack ultramarine clay
- 1/2 pack jade clay
- 1 pack translucent (1/2 for the slab & 1/2 for the backing)
- Acrylic roller
- Pearl powder
- Translucent Liquid Clay
Directions:
1. Condition all colors of clay with your clay machine (keep 1/2 of the translucent pack aside for the backing in step 18). Choose which thickness you prefer—we used the second thickest setting on the machine.
2. Cut each conditioned piece of clay to roughly the same size and shape.


6. Dust this layer of clay with your choice of pearl powder.


9. At this point, you could stop here and jump to step 11.
10. Or you could cut your stack of clay in half, add a thin layer of translucent liquid clay on top of the translucent piece, and place one stack of clay on top of the other.
11. Gently press the layers of clay together to ensure they've attached.


15. Repeat the rolling process from step 13, if desired. The more you do this, the smaller and closer the swirls will be.


17. Using your tissue blade, slice your clay into pieces of a similar size.
18. Take the remaining translucent clay and condition it through the clay machine ending on a thin setting. We used the 4th thickest setting on our machine.

19. Strategically place each slice of clay on the translucent clay to form a sheet. Sometimes turning the clay around to match patterns is helpful.
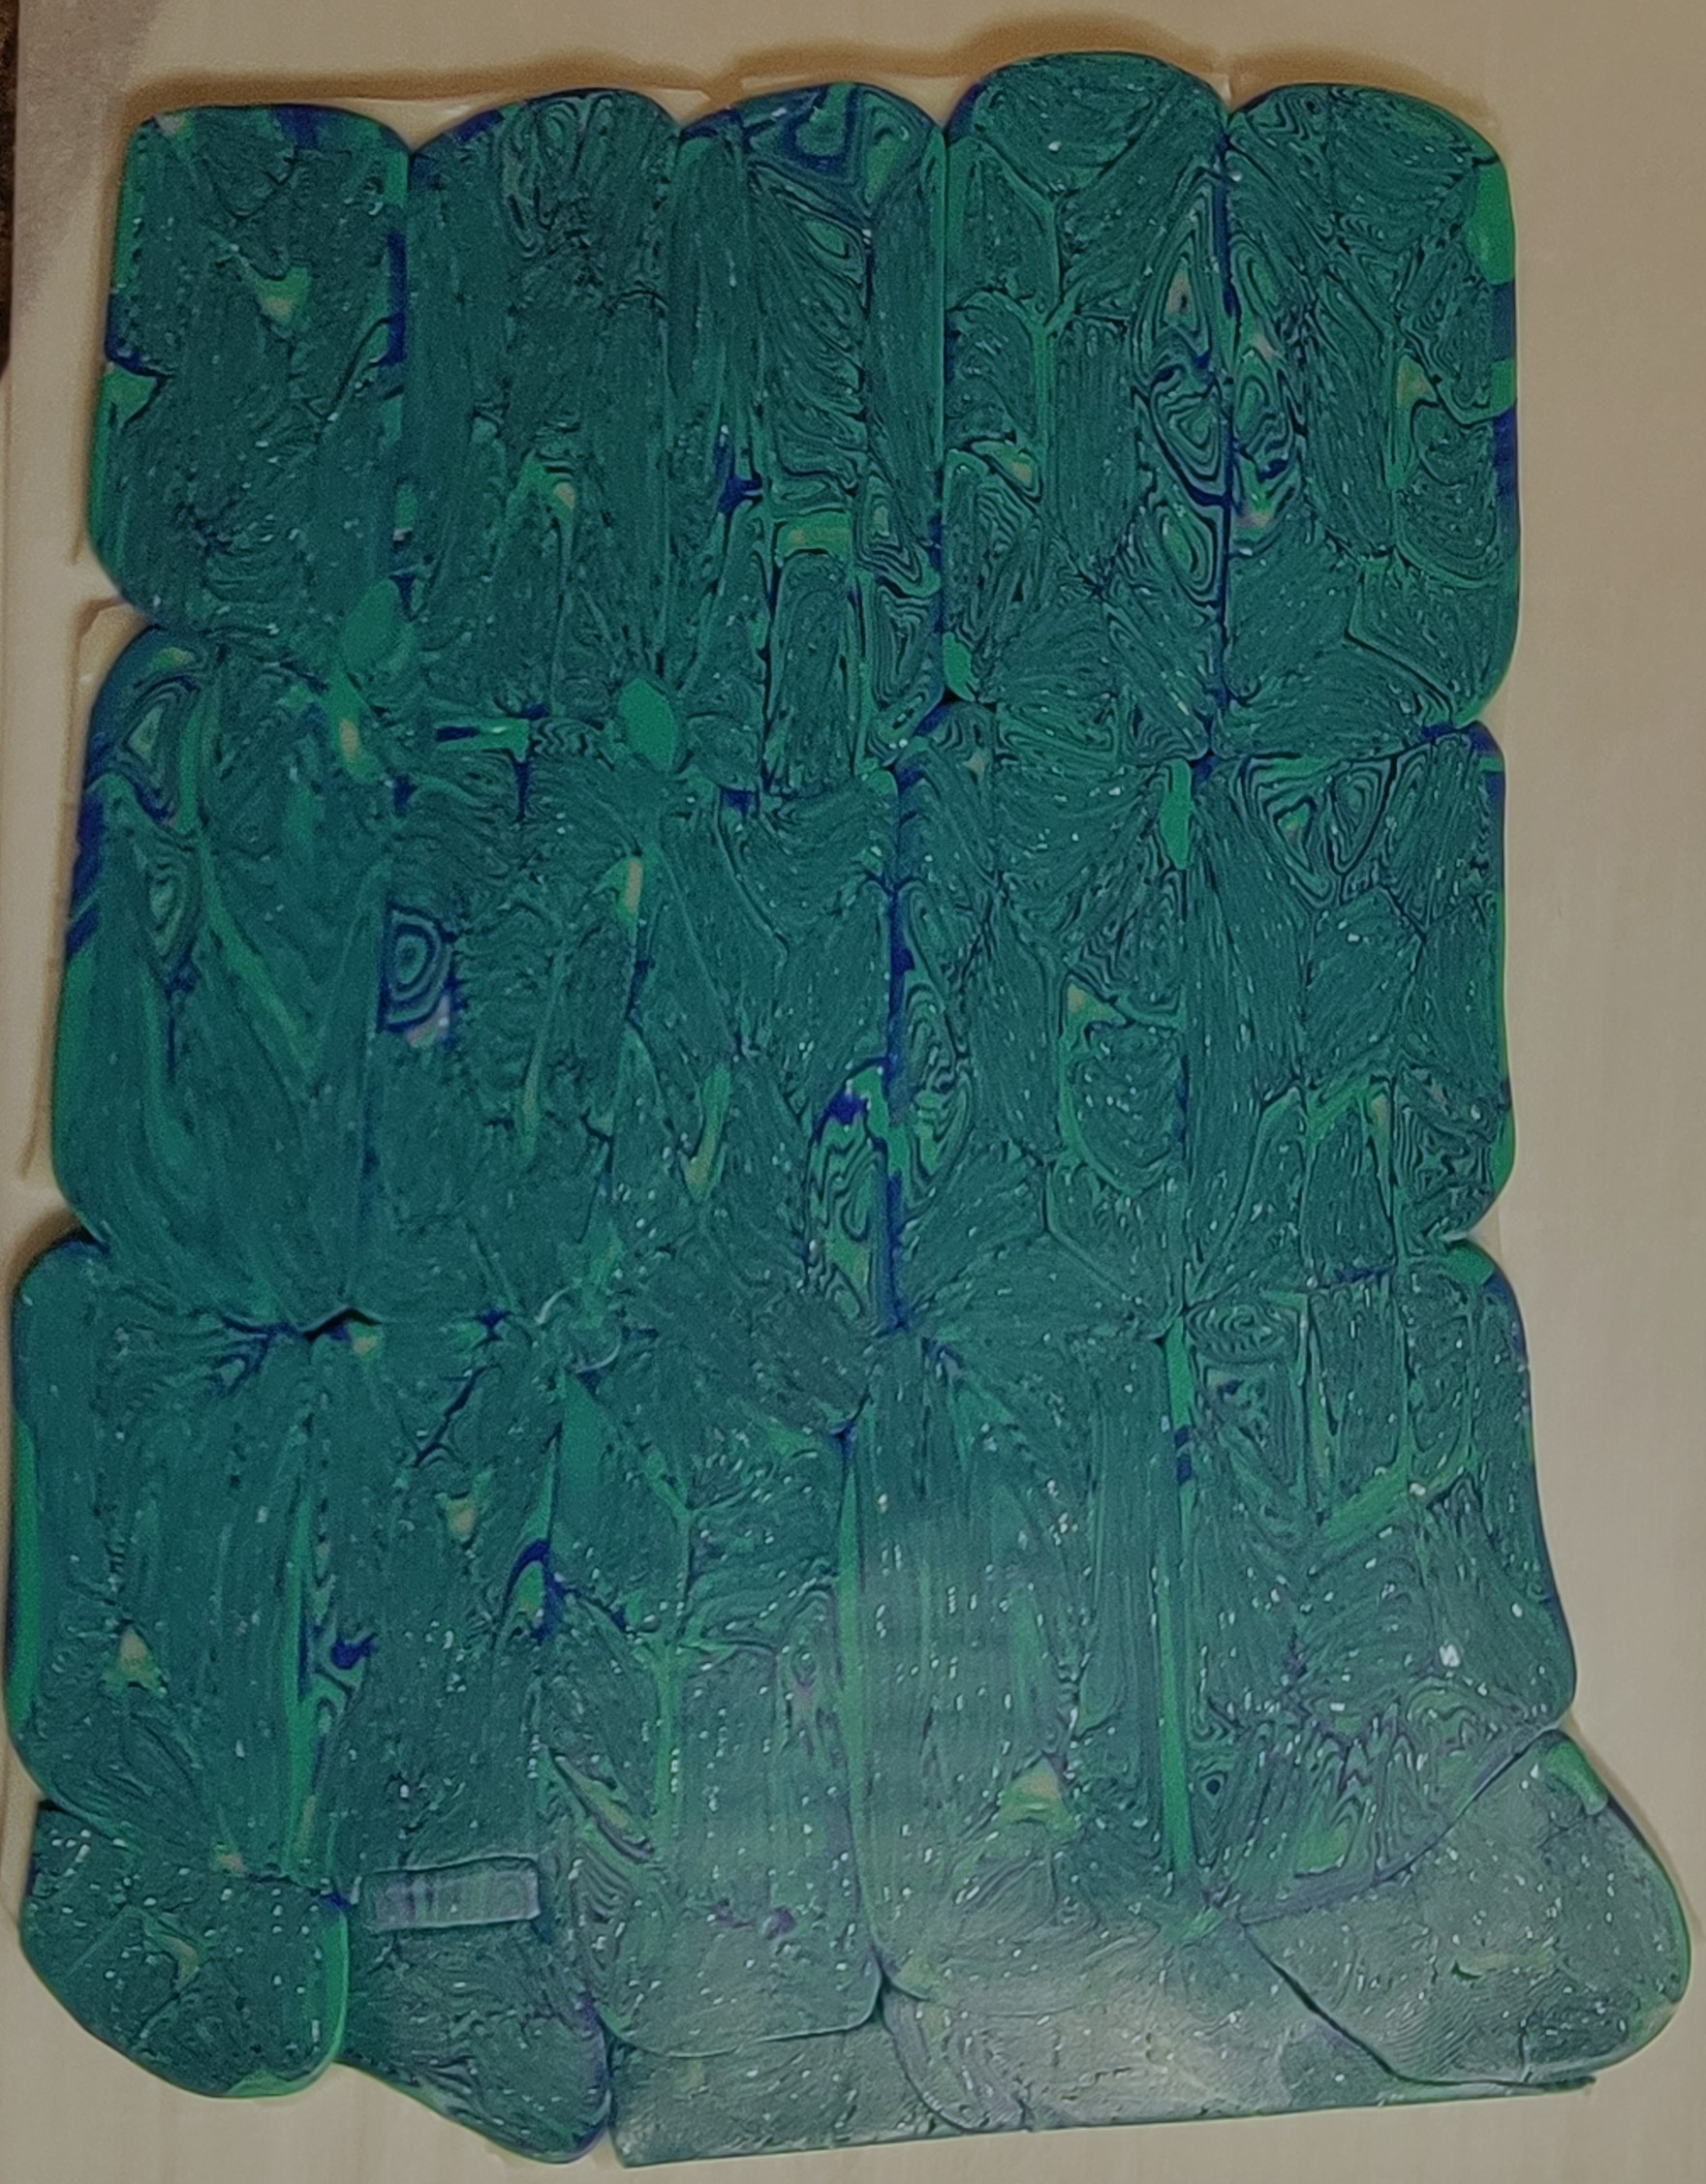
20. Once each piece has been placed on the translucent clay, carefully run your slab through the clay machine on the thickest setting. Or, you could also use your acrylic roller here.
At this point, you can use your swirly slab for jewelry or any other project! Share what you've made by tagging us in your post.
No comments:
Post a Comment